Top food blogs

Saturday, December 31, 2011

Happy new year!!!


Hi my dearest friends and my lovely followers! Happy new year for everyone!!! I wish you all, that your most precious and brightest dreams come true this coming year! Wish you all, health, happiness, joy, luck and lots of love!!! May you all be happy and joyful all the time!!!
I hope this coming year will be successful for all of us. I love you all and once more a very very Happy New Year!!! xoxoxoxoxoxoxoxo!!!!

Monday, December 19, 2011

Loviyali ugra (Noodle soup with black eyed peas)


"Loviyali ugra" is very nourishing and thick soup. Noodles for this soup are usually made at home, just as here: http://uzbekcooking.blogspot.com/2009/12/tovuq-shurvali-ugra-home-made-macaroni.html, but if you want to make it easier, you can use ready made noodles. Ready made noodles won't taste as home made noodles though:) "Loviyali ugra" can be made with meat (lamb, beef) or with chicken. I prefer to use chicken:)
Ingredients:
50 ml of vegetable oil or 50 grams of melted lamb's tail fat
300 grams of meat or chicken, cut in walnut sized chunks
1-2 medium sized onions, peeled and sliced
1 medium capsicum, seeded and cut in small cubes
1-2 medium sized tomatoes, finely chopped
1 carrot, peeled and cut in medium sized cubes
1 potato (optional) peeled and quartered
1 cup of cooked black eyed peas
Half a cup of peas for serving
1 tsp of cumin
1 tsp of crushed or grind coriander
Salt to taste
Fresh chopped greens (I use dried basil)
Less than half of a portion of "Ugra" (as given in recipe)
Heat up oil and brown the meat or fry chicken over high heat, until nice golden color (constantly stirring). Add in onions, fry until onions are transparent, then add in capsicum and carrot and fry until they are half done. Add in tomatoes, spices and potato and fry until vegetables are "clear" or when oil will start to separate out. Add in 1.5 liters of water and bring to boil. Lower the heat, scoop out any foam and let it simmer for about 30-40 min. Add in black eyed peas and cook for another 10 minutes. At the end, add in salt and add in noodles. Cook until noodles are soft, for about 2-3 min.
Serve in individual bowls, topping with some peas and greens.
Yoqimli ishtaha!!!

Wednesday, November 30, 2011

Tvorogli pechenye (Cottage cheese biscuits)


This biscuits remind me my childhood, we used buy them at school's cafeteria and enjoy during break times:) I don't know about the origin of this recipe, but I decided to post it in this blog, as this recipe is very popular in Uzbekistan. These biscuits are soft inside, a little crunchy outside, flavorful and soo yummy!!!
I made them out of my own cottage cheese, but you can always use ready made cottage cheese from the market. In case, if you are interested in my cottage cheese recipe, it is here.
Ingredients:
200 grams of cottage cheese
200 grams of butter
1 egg
Half a tsp of baking powder or baking soda
Pinch of salt
About 2 cups of plain flour
Sugar
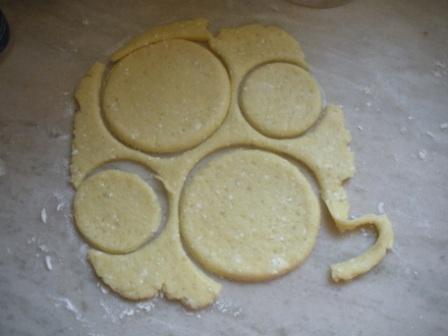
Finely grate cottage cheese, using the smallest eye of the grater. Chop up soft butter with cottage cheese, then add in egg and mix well. Add in baking powder, salt and mix again. Gradually add in flour, just to shape soft, but not sticky dough. I can't tell the exact amount of flour, as it depends on the size of the egg and the texture of the cottage cheese, so just pay attention that dough is soft enough, but not too sticky-it must be comfortable to work with. Wrap the dough and put in fridge for an hour. Then, divide the dough in three-four parts and roll out each piece separately. Cut out circle shapes using cookie cutter or just regular glass. Layer some sugar on a flat plate. You can use white or brown sugar, doesn't matter. In Uzbekistan we mostly use white sugar, but I prefer to use brown sugar. Layer one circle on top of the sugar, softly press with the palm of your hands, then fold the sugary side in, then again fold, again sugar side in, at the end, sprinkle some sugar on top.


Bake in preheated oven, using medium heat, until nice light golden in color. Mmmm, yummy!

Enjoy with your family and friends!
Yoqimli ishtaha!!!

Sunday, November 27, 2011

Besh barmoq (Squared noodles with meat)


"Besh barmoq" is very popular and loved dish in all Central Asian countries. Especially it is popular among Kazakh people, who also claim that "Besh barmoq" is their national dish. I would like to mention that, this dish is also famous among Uzbek people too. I think Kazakhs and Uzbeks are closely connected to each other with common history and culture.
"Besh barmoq" is usually made of fresh lamb and horse meat sausages (or with horse meat). My version is cooked without horse meat sausages, as it is not found, where I live.
Ingredients:
600 grams of meat, lamb/mutton, (preferable fatty and bony parts)
2-3 medium sized onions, peeled and sliced
1 tsp of cumin seeds
1 tsp of fresh crushed coriander seeds
1 tsp of fresh ground pepper
2-3 bay leaves
Salt to taste
For dough:
2 eggs
60 ml of water
1 tsp of salt
Plain flour as needed
1-2 onions, peeled and sliced, for serving
Put meat in deep pan with 2 liters of cold water and bring to boil over high heat. Scoop out all of the foam, lower the heat and let it simmer for at least 3 hours. Then, add in onions and spices, simmer for another half hour. At the end, add in salt. If you are using horse meat, it must be cooked together with lamb, if you are using horse meat sausages, they must be cooked beforehand and are served at the end, just slice and put on top of cooked dough, along with meat.
While soup is simmering, prepare your dough.Whisk eggs with water ans salt. Gradually add in flour, until you will get medium hard dough. Cover the dough and let it rest for at least 20 min. Roll out the dough and then cut it in medium sized squares, you can see the technique here. Open up all squares and let them dry for a while.
When soup is ready, take out all of the meat and set aside. Set the heat on high and cook squared dough pieces in this soup, for about 4-5 min or until soft. Put half of the given portion of dough at once. Take out cooked dough and layer in big plate. Put meat pieces on top and sprinkle with fresh sliced onions. Serve and enjoy!
Yoqimli ishtaha!!!

Thursday, November 17, 2011

"Graffskiye razvalini"-(Duke's ruins)


I couldn't find the information about, from where this recipe is originated, but I can surely tell that, it is very popular and very favorite cake among Uzbek people. I am posting it by request of my readers:) I cooked this cake a long time ago, I was sure that I had photos with the cooking process, but it is so pity I couldn't find them:( Thanks God, I have the main photo, with a ready cake:)
The base of "Graffskiye razvalini" can be made of fluffy sponge cake or with a meringue. If you want it to be more crunchy and light, you have to choose meringue base. I prefer to make it with a sponge cake.
Small meringues on top, can be plain white as well as light brown, using a little cocoa powder. I used bigger baking pan, so, my fluffy base is thinner and "ruins" are not so high. If you will use smaller pan for baking, you will get higher cake. Mine was 10 inch round cake pan.
Ingredients:
If you want to make meringue base:
3 egg whites
1 cup of sugar
A pinch of lemon acid
For regular sponge cake:
6 eggs
1 cup of sugar
1 cup of plain flour
Syrup for sponge cake:
1 tbsp of sugar completely dissolved in 150 ml of water+a pinch of vanilla(vanilla is optional)
For small meringues:
3 egg whites
1 cup of sugar
A pinch of lemon acid
1 tsp of cocoa powder (optional)
For cream:
1 can (400 gr)of condensed milk
400 ml of whipping cream
200 grams of soft cream cheese (optional)
Pinch of vanilla powder
For topping:
200 grams of chocolate
For meringue base, beat up egg whites until stiff peaks. Add in sugar in 3 approaches and whisk for 3-4 min more. At the end, add in lemon acid and whisk for 10 seconds. Pour this mixture in to baking pan, layered with a parchment paper and cook in preheated oven, at a lowest temperature, for a longer time. My teacher used to say "don't bake your meringues, DRY them". And the important secret is - don't change the temperature in the oven. If you have fan oven, that would be perfect for cooking meringue base. Usually it takes 5!!! hours.
Small meringues are made in the same way, but, you have to pipe or spoon small portions onto baking tray, layered with parchment paper and bake for shorter time. (About 1.5-2 hours). If you want to add in cocoa powder, it should be added at the end, along with lemon acid. I use my pastry bag, with a medium sized "star" former, to shape my small meringues.
For sponge cake:
Whip egg whites until stiff peaks, add in sugar in 3 portions and whisk for another 1-2 min. Add in egg yolks, one by one and mix carefully. Now, add in flour and again mix carefully. Pour cake batter in baking pan, layered with baking paper and put in to the cold oven. Bake for 40 min in medium heat. Baking time can vary, as ovens are different. I baked mine for 1,5 hour:) (My oven is just a disaster!!!)Just check up with a wooden stick. If it will come out clean when inserted, than cake is ready. Take out and let it cool completely. Peel of baking paper, cut the cake in two halves and set aside.
Beat up cream, when it will just to start to thicken,gradually add in condensed milk and beat until thick and smooth. At the end, add in cream cheese and vanilla, beat for 1 min more. Don't over beat the cream! You can skip cream cheese, but I like it's taste and that's my favorite cream:)
To assembly the cake, put one piece of sponge cake on a big flat tray, sprinkle with a syrup and evenly spread cream over the top. Put on the second half and spread more cream on top. Now, start placing small meringues on top of the cake. For that, just spread some cream at the bottom of meringue and stick it to the cake. You can arrange your meringues to your taste, but usually it is done as in attached photo. When you done with meringues, fill the spaces with a cream. Also decorate the sides of the sponge cake.
Melt chocolate on a double boiler and immediately pour over the cake. Cake also can be sprinkled with some coconut powder.
Although, the recipe is long and it seems to be quiet difficult, preparing is easy and fun. It just takes a little time:) I am sure, that you will love the result! Enjoy your gorgeous and heavenly tasty cake!!!
Yoqimli ishtaha!!!

Thursday, November 10, 2011

Baliq Palov (Pilaf with fish)


"Baliq palov" is famous in those regions, where fish is commonly used for everyday dishes. I know that, this kind of pilaf is very popular among fishermen in Khorezm region. Maybe it is cooked in some other regions too, I just don't have that information, but I'll try to find out. "Baliq palov" can be prepared out of carp or fresh water catfish or any other "meaty" fat fish.
Ingredients:
500 grams of fish (I used my favorite carp)
500 ml of vegetable oil for frying
2-3 onions, peeled ans sliced
3-4 medium sized carrots, peeled and flaked or cut in thin long strips
350 grams of rice
1 tsp of crushed coriander seeds
2/1 tsp of fresh ground pepper
Salt to taste
Cut fish in medium sized chunks. Heat up oil and deep fry the fish over medium heat, until nice golden color. Take out and set aside.

Very carefully pour out all of the oil, but 130 ml. Put in onions and fry over high heat, until onions are transparent, but not browned. Put in carrot flakes, fry for about 10 min, add in all spices and salt, pour enough water to half cover vegetables. Bring to boil, then reduce the heat and cook for 20 min (until almost all water is evaporated). Finely wash the rice and layer evenly on top of the vegetables. Pour enough water to cover the rice for half an inch. Set the heat on high and let all the water evaporate. Check for saltiness. Now, mix only the top of the rice, place fried fish chunks on top, cover the lid and cook over very low heat, for about 10-15 min.

Open up the lid, again, carefully mix only the top of the rice and cook for another 10-15 min or until rice is finely cooked.
At the end, take out fish chunks and finely mix the entire pilaf. Serve with fresh vegetable salad and a pot of green tea, enjoy!

Yoqimli ishtaha!!!

Thursday, October 27, 2011

Ma'jun palov (Pilaf with carrot juice)


"Ma'jun palov" is one of the oldest and almost forgotten recipes of pilaf. It is always cooked with chicken (which is perfect for me:) According to our great ancestor Abu Ali Ibn Sina, this kind of pilaf is very useful and healthy, as it is cooked with carrot juice. In our folk medicine "Ma'jun palov" is used as a cure for anemia and for diabetics. Besides, it is really really tasty and nutritious. I just loved it!
Ingredients:
100 grams of any vegetable oil
500 grams of chicken
2-3 onions, peeled and sliced
1.5 kg of carrots
1 tbsp of ground or crushed coriander seeds
1 tsp of cumin seeds
350 grams of rice (I used basmati, but i think any type of rice will go well)
Salt to taste
Peel all of your carrots. Use red and juicy, sweet type of carrot, mine were dark red carrots.

Make juice out of all carrots, but 2-3 pieces. 2-3 carrots must be cut in thin long strips.

Wash up your rice and add in 1 tbsp of salt, then pour very hot water over rice to completely cover it. Mix slightly and set aside.
Now heat up the oil in heavy crock pot and put in sliced onions. Fry over high heat, until onions are transparent, then add in chicken and continue frying until chicken is nice golden in colour. Add in carrots and fry continuously stirring, for about 5-6 min. Add in some carrot juice, just enough to half cover chicken and vegetables.

Lower the heat, half cover the lid and simmer for about 30-40 min. At the end, add in all of spices and some salt to taste.
Finely drain rice and evenly layer over vegetables. Pour carrot juice over rice, enough to cover it for about a half inch.

Set the heat on high and let all of the juice to evaporate. Check for saltiness, add some salt if needed.

When all of the juice is evaporated, lower the heat on very low, slightly mix up only the top of the rice, cover the lid and cook for about 15 min. Then, open up the lid, again mix only the top of the rice, cover the lid and cook for 10-15 min more or until rice is completely cooked.
When pilaf is ready, finely mix the entire pilaf and serve it in a big flat plate. You will see how beautiful and tasty is this pilaf, orange-red in color and rich in flavor! Serve some fresh salad on side. Enjoy your yummy "Ma'jun palov" with your family and friends!
Yoqimli ishtaha!!!