Top food blogs
Showing posts with label Sweets. Show all posts

Wednesday, April 23, 2014

Again "Sumalak":)

Hi everyone! I am so happy that I am back here:) How are you? Hope everything is great on your side! Todays post is again about "Sumalak". Spring is the right season for this dish and so, I usually got many comments and emails about "Sumalak" during this season. I am so delighted when my readers send me their photos with the "sumalak" they cook and I really appreciate that they give me a lot of kind feedbacks! I want to say thank you to all my readers! Thank you for your comments, appreciation and your photos!
First of all I want to show you the photos of my wonderful reader Nadira. Her sumalak turned out great! It looks great and she said it tastes great too!


Here's what she wrote to me:
"Thank you for your wonderful recipe! I made Sumalak at home and My Sumalak turned out so yummy and beautifully! My family enjoyed! I really love your blog! 
PS: I want to show the photo of My Sumalak to you. Where can I post the photos! Thank you so much! May Almighty Allah bless you and your family! :-) "
 "Now I am sending My Sumalak photos to you! It tasted really great! Thank you so much for your amazing Sumalak recipe once again! May Almighty Allah bless you and your family! May all your dreams come true! :-)
Best regards,
Nadira :-))"

Thank you Nadira for your appreciation and photos! 
I noticed that Nadira added some walnuts to her "Sumalak" instead of stones. I can tell you that the walnuts in "Sumalak" taste really nice! I also noticed those home baked breads in this photo, I bet Nadira baked them along with "Sumalak", they look yummy too! Nadira you did a great job!!!
I myself been cooking "Sumalak" for three years now. I try to cook "Sumalak" every year, just in 2013 I didn't cook it, because I couldn't find the right wheat for my "Sumalak" (we were outside of Uzbekistan). There is saying in our culture that when you open up your "Sumalak" at the very end (when it is done after closing the lid) the picture on the surface of the "Sumalak" can predict the future. I don't know if it is true or not, but I never could guess the meaning of pictures in my "Sumalak"s :) Here I am posting the photos, I will ask you to guess what it might be telling:) 
Here my "Sumalak" in 2011:
In 2012:
In 2014:
Ingredients and the cooking methods were the same, but as you can see, every time the picture turned out different:) 
This year I didn't planned to cook "Sumalak", I thought I would buy it from local markets. But after trying about 20 different "Sumalak"s , I decided to cook it myself, because I couldn't find the "right" taste that I like. This was my first time cooking "Sumalak" in Uzbekistan! 
My wheat sprouts were so beautiful, it was pity to cut and grind them:) 


While cooking I recommend to stick newspaper all around your stove. "Sumalak" will bubble a lot at the end, so paper will make your work easier-you will not be mad wiping out those sticky dots on your stove and nearby walls:) 
 And one more tip: Cook your "Sumalak" with lots of LOVE, that's how it turns out great and yummy!!!
And finally me :) while cooking "Sumalak" (don't mind my look, I was tired and it was midnight:) )


That's all!: ) Our "Sumalak" turned out so yummy and thick! Better than any chocolate!  
Thank you for your time! 
With a lot of joy and happiness, 
Malika

Monday, February 13, 2012

"Olma" pechenyesi ("Apple biscuits")


Hi there my dears! God bless us all in our wonderful and amazing lives!!! I feel so positive and joyful right now, that I wanted to share my LOVE and energy with you all! I just want to say that, keep on dreaming and believe in everything good! I love you all!!!
As for recipe:) I don't really remember the origin of these biscuits, but I know them from my childhood, so I can relate them to our cuisine:) Try to choose sweet, medium sized apples, which are flavorful and not so juicy. I made 6 "Apple"s out of this recipe:)
Ingredients:
130 grams of butter or margarine
100 ml of full fat cream
Half a tsp of baking powder
Half a cup of powdered sugar
Plain flour as needed (better start to measure flour, as sometimes it's complicated for beginner cooks, sorry, xoxo)
6 apples
6 tsp of cinnamon powder
Handful of black raisins
Handful of any nuts (I used almonds)
6 cloves
Grate butter using the big eye of the grater. Add in 1 cup of flour and start to mix, rubbing it between the palms of your hands. When it gets crumbly, add in sour cream, sugar, baking powder and mix again with spatula. Now start adding more flour, mix with hands, until you will form medium hard dough. Cover and put in fridge for 1 hour.
Divide the dough in 6 equal parts. Clean your apples using special knife.

Now, roll out one of the pieces of dough and sprinkle some cinnamon on top, put apple in the middle and fill with nuts and raisins. Sprinkle more cinnamon on top.

Pinch out the edges, to finely cover the apple. Put one clove at the top.

Repeat with other dough pieces and apples. Bake in preheated oven, using the middle rack, until nice, light golden in color. Take out and generously sprinkle with powdered sugar. Mmmm, yummy! Enjoy!
Yoqimli ishtaha!!!

Wednesday, November 30, 2011

Tvorogli pechenye (Cottage cheese biscuits)


This biscuits remind me my childhood, we used buy them at school's cafeteria and enjoy during break times:) I don't know about the origin of this recipe, but I decided to post it in this blog, as this recipe is very popular in Uzbekistan. These biscuits are soft inside, a little crunchy outside, flavorful and soo yummy!!!
I made them out of my own cottage cheese, but you can always use ready made cottage cheese from the market. In case, if you are interested in my cottage cheese recipe, it is here.
Ingredients:
200 grams of cottage cheese
200 grams of butter
1 egg
Half a tsp of baking powder or baking soda
Pinch of salt
About 2 cups of plain flour
Sugar
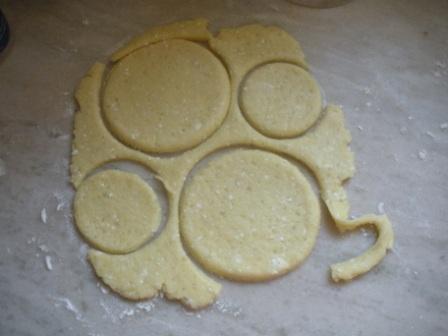
Finely grate cottage cheese, using the smallest eye of the grater. Chop up soft butter with cottage cheese, then add in egg and mix well. Add in baking powder, salt and mix again. Gradually add in flour, just to shape soft, but not sticky dough. I can't tell the exact amount of flour, as it depends on the size of the egg and the texture of the cottage cheese, so just pay attention that dough is soft enough, but not too sticky-it must be comfortable to work with. Wrap the dough and put in fridge for an hour. Then, divide the dough in three-four parts and roll out each piece separately. Cut out circle shapes using cookie cutter or just regular glass. Layer some sugar on a flat plate. You can use white or brown sugar, doesn't matter. In Uzbekistan we mostly use white sugar, but I prefer to use brown sugar. Layer one circle on top of the sugar, softly press with the palm of your hands, then fold the sugary side in, then again fold, again sugar side in, at the end, sprinkle some sugar on top.


Bake in preheated oven, using medium heat, until nice light golden in color. Mmmm, yummy!

Enjoy with your family and friends!
Yoqimli ishtaha!!!

Thursday, November 17, 2011

"Graffskiye razvalini"-(Duke's ruins)


I couldn't find the information about, from where this recipe is originated, but I can surely tell that, it is very popular and very favorite cake among Uzbek people. I am posting it by request of my readers:) I cooked this cake a long time ago, I was sure that I had photos with the cooking process, but it is so pity I couldn't find them:( Thanks God, I have the main photo, with a ready cake:)
The base of "Graffskiye razvalini" can be made of fluffy sponge cake or with a meringue. If you want it to be more crunchy and light, you have to choose meringue base. I prefer to make it with a sponge cake.
Small meringues on top, can be plain white as well as light brown, using a little cocoa powder. I used bigger baking pan, so, my fluffy base is thinner and "ruins" are not so high. If you will use smaller pan for baking, you will get higher cake. Mine was 10 inch round cake pan.
Ingredients:
If you want to make meringue base:
3 egg whites
1 cup of sugar
A pinch of lemon acid
For regular sponge cake:
6 eggs
1 cup of sugar
1 cup of plain flour
Syrup for sponge cake:
1 tbsp of sugar completely dissolved in 150 ml of water+a pinch of vanilla(vanilla is optional)
For small meringues:
3 egg whites
1 cup of sugar
A pinch of lemon acid
1 tsp of cocoa powder (optional)
For cream:
1 can (400 gr)of condensed milk
400 ml of whipping cream
200 grams of soft cream cheese (optional)
Pinch of vanilla powder
For topping:
200 grams of chocolate
For meringue base, beat up egg whites until stiff peaks. Add in sugar in 3 approaches and whisk for 3-4 min more. At the end, add in lemon acid and whisk for 10 seconds. Pour this mixture in to baking pan, layered with a parchment paper and cook in preheated oven, at a lowest temperature, for a longer time. My teacher used to say "don't bake your meringues, DRY them". And the important secret is - don't change the temperature in the oven. If you have fan oven, that would be perfect for cooking meringue base. Usually it takes 5!!! hours.
Small meringues are made in the same way, but, you have to pipe or spoon small portions onto baking tray, layered with parchment paper and bake for shorter time. (About 1.5-2 hours). If you want to add in cocoa powder, it should be added at the end, along with lemon acid. I use my pastry bag, with a medium sized "star" former, to shape my small meringues.
For sponge cake:
Whip egg whites until stiff peaks, add in sugar in 3 portions and whisk for another 1-2 min. Add in egg yolks, one by one and mix carefully. Now, add in flour and again mix carefully. Pour cake batter in baking pan, layered with baking paper and put in to the cold oven. Bake for 40 min in medium heat. Baking time can vary, as ovens are different. I baked mine for 1,5 hour:) (My oven is just a disaster!!!)Just check up with a wooden stick. If it will come out clean when inserted, than cake is ready. Take out and let it cool completely. Peel of baking paper, cut the cake in two halves and set aside.
Beat up cream, when it will just to start to thicken,gradually add in condensed milk and beat until thick and smooth. At the end, add in cream cheese and vanilla, beat for 1 min more. Don't over beat the cream! You can skip cream cheese, but I like it's taste and that's my favorite cream:)
To assembly the cake, put one piece of sponge cake on a big flat tray, sprinkle with a syrup and evenly spread cream over the top. Put on the second half and spread more cream on top. Now, start placing small meringues on top of the cake. For that, just spread some cream at the bottom of meringue and stick it to the cake. You can arrange your meringues to your taste, but usually it is done as in attached photo. When you done with meringues, fill the spaces with a cream. Also decorate the sides of the sponge cake.
Melt chocolate on a double boiler and immediately pour over the cake. Cake also can be sprinkled with some coconut powder.
Although, the recipe is long and it seems to be quiet difficult, preparing is easy and fun. It just takes a little time:) I am sure, that you will love the result! Enjoy your gorgeous and heavenly tasty cake!!!
Yoqimli ishtaha!!!

Monday, June 13, 2011

"Ptichye moloko" (Marshmallow cake)


I am familiar with this cake as long as I remember myself. It was very popular then and now it is still loved by many peoples. I really don't know where this cake was originated from, I think from Russian or Ukrainian cuisine. If someone knows, you can leave a comment. I love this cake because it is really easy to make, relatively fast and heavenly delicious!!! In original recipe the base cake is made just like regular sponge cake as I made for "Kiyevskiy tort" (fluffy cake), but I really don't want to waste anything, so I make slightly different cake using only egg yolks, as egg whites are used for marshmallow layer.
As I baked this cake a long time ago,I don't have many pictures, so I promise to post some more pictures later, when I will be baking it in these days.
Ingredients:
for marshmallow layer
5 egg whites
1 very full cup of sugar
1/3 cup of water
2,5 tbsp of gelatin powder
90 ml of water
Half a tsp of vanilla powder or 2 tsp of vanilla essence
For cake
5 egg yolks
1 cup of sugar
100 grams of cream
100 grams of butter, melted
100 ml of milk
1.5 cup of plain flour
1 tsp of baking powder
For light syrup
1 cup of water
3 tbsp of sugar
(for syrup just mix sugar with very hot water until completely dissolved)
For glazing
250 grams of chocolate or
3 tbsp of cocoa powder
3 tbsp of sugar
5 tbsp of milk
1 tsp of butter
For the cake beat egg yolks with sugar until they will be light in color. Add in cream, milk and melted butter, mix well. Mix in baking powder and flour. If it is too runny add in more flour, if it is too thick add in milk (it depends on how big are eggs). Bake in preheated oven until it is ready- insert toothpick and when it will come out clean, the cake is ready. Take it out and let it cool.
For marshmallow, mix gelatin with 90 ml of water and set aside for 20 min. After, heat over double boiler until gelatin is completely dissolved, don't boil!
Pour 1/3 cup of water over sugar and bring to boil over high heat, simultaneously begin to whip egg whites until stiff peaks using an electric mixer. Check the syrup- pour half a tsp of a syrup into the ice cold water and try to make a ball with your two fingers. If it will easily turns to a soft ball, then it is ready. Now, with a running mixer start to pour the syrup with small portions over egg whites, be careful, syrup is very hot. Beat for 5 min more after you use up the syrup. Now start adding gelatin, also pouring it by small portions. Beat for 2 min more. Add in half a tsp of vanilla and mix well.
Slice the cake in two horizontally , making one part thicker than another. Place thick part in plate, put the circle of the spring form over. Sprinkle with a light syrup and pour in marshmallow. Put in fridge for about 20 min or until marshmallow layer will be completely set. Sprinkle syrup over the other thin part of cake and place over the marshmallow layer. Again put in fridge for 15 min.
Run the knife around the edges of the cake and take out spring form. Melt chocolate over double boiler and evenly pour over cake or make chocolate frosting- finely mix cocoa powder with sugar, add in milk and mix again. Put over high heat and bring to boil. Once it comes to boil, lower the heat and cook constantly stirring until it will get thick. At the end add in butter, take from heat and mix well. Pour over cake while it is hot. Let it cool and then put the cake in fridge for about 30 min before serving.
You can also decorate the cake according to your taste.
Marshmallow part also can be made with different taste. If you add 1 cup of fruit puree or chopped fruits, it will be fruit marshmallow, if you pour in 100 grams of melted chocolate, it will be chocolate marshmallow, if you add in 100 grams of condensed milk mixed with 50 grams of butter, it will taste like creamy-vanilla marshmallow. All the additions must be added right after the gelatin.
Enjoy your yummy treat!
Yoqimli ishtaha!!!

Monday, May 16, 2011

Kiyevskiy tort


"Kiyevskiy tort" is very popular in Uzbekistan and I think it was originated from Ukrainian cuisine. This cake has to be prepared a day before serving, as it will be more tender and mouth melting. Buttery creams or whipped creams must be used for this cake. You can use your favorite one. I usually used the butter and sweet condensed milk cream, but this time I use whipped cream with condensed milk and cream cheese. Actually meringue layer of this cake is called "Kiyevskiy" and it can be used as a layer for other cakes or as an independent cake as itself. For an independent "Kiyevskiy" you have to bake two meringue layers and combine them with buttery cream.
Ingredients:
For meringue layer:
6 egg whites (use big eggs)
1,5 cup of sugar
1 cup of chopped walnuts
3,5 tbsp of plain flour
For fluffy cake:
6 eggs
1 cup of sugar
1 full cup of plain flour
For cream:
250 ml of full fat whipping cream
250 grams of cream cheese
1 can of sweet condensed milk
For syrup:
1 cup of water
4 tbsp of sugar
Meringue layer:
Beat egg whites until stiff peaks and then add in sugar with a small portions. Whip for another 2 min. In another bowl mix walnuts and flour and add it into the whipped egg whites, mix very carefully. Layer baking pan with a cookie paper and pour in cake batter. Put in the middle rack of the oven (oven is not preheated) in medium heat for about 20 min and then set the heat on low (lowest heat of your oven), bake/dry for about 4-5 hours or until it is completely dry (check with a wooden stick, it must come out clean when inserted to the meringue). Take out and let it cool. Peel of the baking paper and set aside.

For fluffy layer:
Whip egg whites until stiff peaks, add in sugar in 3 portions and whisk for another 1-2 min. Add in egg yolks, one by one and mix carefully. Now, add in flour and again mix carefully. Pour cake batter in baking pan, layered with baking paper and put in to the cold oven. Bake for 40 min in medium heat, baking time can vary as ovens are different, I baked mine for 1,5 hour:) (My oven is just a disaster!!!)Just check up with a wooden stick. If it will come out clean when inserted, than cake is ready. Take out and let it cool completely. Peel of baking paper, cut in two halves and set aside.

Prepare syrup. Just put sugar in water and boil until sugar will dissolve completely.
For cream:
Whip the cream until it starts to thicken and immediately add in condensed milk, whip again, until it again starts to thicken and at the end add in cream cheese and whip for about 1-2 min. If you want you can add in vanilla at the end.
Now place one fluffy cake layer in flat plate, sprinkle with syrup and spread the cream all over evenly. Place meringue layer on top. Spread cream on top of the meringue layer. Take the second layer of the fluffy cake, sprinkle with syrup holding it in your hand and spread cream evenly and place over the meringue layer.

Spread cream on top and the sides of the cake, decorate as your wish. This time I used my favorite strawberries:)
Put the cake in fridge for at least 6 hours. After that, enjoy and don't swallow your tongue:) because it is unbelievably yummy!!!

Yoqimli ishtaha!!!

Monday, April 18, 2011

Qulupnay djemi (Strawberry jam)


In Uzbekistan, in strawberry season, people usually make preserves for winter times. One of them is this strawberry jam, which is perfect sauce for crepes and ice creams, delicious filling for different pies or donuts.
Ingredients:
1 kg of fresh, ripe strawberries
1 kg of sugar (can be reduced to 600 grams, but you will have to cook it longer)
Finely chop up or blend all of the strawberries. Add in all the sugar. Mix well and let it rest for 1 hour. After 1 hour, mix again and bring this mixture to boil over medium heat. Constantly stir until it will start to boil. Then set the heat on low and simmer jam until it is very thick, make sure you're stirring it unceasingly when it will start to thicken. Pour jam into the sterilized hot glass jars and close tightly.
Yoqimli ishtaha!!!

Friday, March 25, 2011

Shirin somsa (Sweet samusa)


"Shirin somsa" is a special samsa which is usually made for Navruz celebrations or any other special occasions. It is high in calorie and very nutritious. I like it's naturally sweetness and that they can be made without any sugar. You can use different dried fruits, but usually black raisins, dried figs, 2-3 kinds of nuts are used for the filling. I also like to add dates, as it gives extra taste and helps to join all the ingredients with it's stickiness. As for as nuts, I usually use almonds and walnuts.
Ingredients:
For dough:
200 grams of butter or margarine
200 ml of sour cream
1 tsp of baking soda
Pinch of vanilla
Plain flour as needed
For filling:
100 grams of walnuts
100 grams of black raisins
100 grams of almonds
100 grams of dried figs
100 grams of dates
4 tbsp of honey or 50 grams of sugar (optional)
First of all, prepare dough and refrigerate for an hour. Chop chilled butter with 1 cup of flour until it will resemble bread crumbs. Add in sour cream, vanilla and baking powder and mix well. Start adding plain flour until you will form soft, but not sticky dough. Wrap and refrigerate.
Chop all of the dried fruits and nuts. Add in honey and mix well.

Take out dough from fridge and divide in two. Roll each piece and cut equally.

I like to make "Shirin somsa"s small, but you can make them bigger if you want.
Roll each piece and put 1.5-2 tsp of filling and pinch the edges.

Roll and shape all of your samsas and bake in preheated oven, until nice golden in color. Sprinkle powdered sugar while samsas are hot.
Serve with a nice hot cup of tea and enjoy!
Yoqimli ishtaha!!!

Thursday, January 6, 2011

My cakes!

I must say that nowadays cake business is well developed in Uzbekistan. Cake decoration is one kind of art today and I also tried to make some for my dear ones:) These cakes were baked and decorated by me and the ideas are also mine. All decoration in my cakes are eatable. I use special candy dough for making figurines.
This one was baked for my nephew for his first birthday party. I made fruits out of my marshmallow paste.:


This one was for my little one for her first birthday:

Next cake was baked for new year party:)


For my husband's birthday:

Another party cake "Pyanaya vishnya" Which is "Drunk cherry" cake:)


"Graffskiye razvalini" which means "Ruins of a duke" :)

"Ptichye moloko" cake which means "Milk of a bird":

My favorite cheese cake with strawberries:


Cake for my honey pie for her 5th birthday party. She loves "Finding Nemo" and watches it almost everyday:)

Cake for my party:

Hope you enjoyed my post:)

Wednesday, December 29, 2010

Saqich-qand (Caramel candies)


I love these sticky and chewy candies. It's always nice to make different candies at home by yourself, as you can be sure about ingredients and also they are 100% natural.
Ingredients:
3/4 cup of milk,
1 cup of sugar
30 gr of butter
Mix together milk and sugar. Put on a high heat and bring to boil. Reduce heat on medium and simmer for about 8-10 min. It will foam a lot, so be careful and unceasingly stir. Add in butter. Continue simmering for another 10-15 min or until syrup is thick enough. To check the readiness pour one drop of syrup on a dry plate and bend, if it's not running, then it's ready. Pour on ice cube molds and put in fridge for overnight. Don't forget to grease the mold with vegetable oil.
Take out caramel candies and enjoy them with a hot cup of tea:)
Yoqimli ishtaha!!!

Wednesday, December 8, 2010

Olma qand (Glazed apples)


"Olma qand" was my favorite when I was a child. It's a pity that nowadays you can rarely find them on sale. But the good thing is, you can prepare them at home by yourself. My daughter just love them and calls them "Apple lollipops".
Ingredients:
6 medium sized apples
1 cup of sugar
1/4 cup of water
6 wooden skewers
Some crashed nuts (optional)
Finely wash apples. Stick wooden skewers in to apples.
Mix sugar and water and put on a high heat. Boil until syrup will be thick and light brown. Mix during process.
Take syrup from heat and quickly deep in apples one by one and then if you want roll apples over nuts. Your apple lollipops are ready to eat!
Yoqimli ishtaha!!!

Wednesday, December 1, 2010

Uzbek profiteroles (Zavarnoye)


I can't tell where this recipe is originated from, Russians, Italians or French, but surely it is very famous sweet in Uzbekistan. I love it's puffiness and lightness. I use different fillings for it, today's is custard chocolate cream. Usually I like to use my favorite - sweet condensed milk beat with sour cream. If you like you can use any other your favorite filling. You will get 30 small or 15 big pastries from this recipe.
240 ml or 1 cup of water
115 grams of butter
pinch of salt
1 full cup of plain flour
3-4 eggs
For cream:
1 cup of milk
2 eggs
2 tbsp of plain flour
2 tbsp of unsweetened cocoa
200 gram of sugar
50 grams of butter
Cut butter in small pieces, add in water and put on a medium heat, when it comes to boil add in salt and flour. Mix vigorously until dough becomes a mass that pulls away from the sides of the pot and will form a nice dough ball. Take from heat and let it cool down.
Blend in eggs one by one in to the dough, mixing vigorously each time until dough will absorb the egg. If your eggs are small use 4 eggs, if they are big then use 3. The dough must be thick and must not be runny. Use pastry bag or just a spoon and set small balls on your baking sheet. I use teaspoon for making small ones and a pastry bag for bigger ones.
Bake in preheated oven on 200 C for 10 min then reduce to 180C and bake for 25-30 min, or until it is nice golden in color. Don't open your oven for the first 20 min or your pastry will set down.
For filling: Beat eggs and sugar until eggs are pale in color and then add in half a cup of milk, beat again for 1 min. Add in 2 tbsp of flour and beat until smooth. Add in the rest half of the milk, beat for 2 min. Set your heat on high and bring mixture to boil, continuously stirring. When it comes to boil, lower the heat and cook stirring until mixture is thick enough, it mustn't run from the spoon. But don't over cook! Take from the heat, pour it in to another bowl and let it cool. Beat in 50 grams of butter. If you want to make chocolate cream, add in chocolate along with flour.
Slightly cut up each pastry and fill with cream or use your pastry bag for that purpose.
Sprinkle with icing sugar and just enjoy this mouth melting pastry!
Yoqimli ishtaha!

Tuesday, May 11, 2010

Sangza


"Sangza" is a great snack with herb or yogurt dips. I especially love hot ones with chili and garlic:) It is one variety of "Bu'girsoq" (I have posted the recipe earlier).
In our tradition we cook this snack for holidays and especially for "Eyd". Mostly "Sangza" is cooked in villages. You can make them bigger or smaller if you want, in original it is bigger than mine, but I prefer this size as it is easy to hold and dip. You will get about 34 "Sangza"s from this recipe.
Ingredients:
200 ml of milk
30 gr of butter
1 tsp of sugar
A pinch of salt
Half a tsp of baking powder
1 egg
Plain flour as needed
Some oil for deep frying
First put butter in milk and heat over low heat until butter will dissolve, take from the heat, add in salt, sugar and baking powder. Stir well and slightly cool it. Then add in egg and beat slightly, until egg will mix well with other ingredients. Now gradually add in flour. Form medium hard dough. Cover and let it rest for 1 hour. Then knead well for 2 min and divide the dough in to the 34 equal pieces. Roll each piece in long log and fold it like this:

Now fold once more:

Repeat with other pieces. Don't forget to close ready rolled and folded pieces with cotton towel, as they will dry out quickly. Now when all pieces are rolled and folded, heat up oil and deep fry your "Sangza"s until nice golden color. After put them on a paper towel to get rid of extra oil. Then when you've done with all pieces, sprinkle over with powdered sugar and serve! Enjoy your "Sangza" with hot tea or dipping it in your favorite dip!
Yoqimli ishtaha!!!